

Are you tired of scrolling through Pinterest, dreaming of a beautifully decorated home but feeling overwhelmed by the thought of DIY projects? 🏠✨ You’re not alone! Many of us long for a personalized, stylish living space but worry we lack the skills or creativity to make it happen.
But what if I told you that transforming your home doesn’t have to be daunting or expensive? In fact, with just a few simple tools and a dash of imagination, you can breathe new life into your space and create stunning decor pieces that reflect your unique style. From customizing picture frames to crafting statement mirrors, this blog post will guide you through 10 easy DIY home decor projects that are perfect for beginners. So, grab your crafting hat and let’s dive into the world of DIY decor – where creativity knows no bounds and your dream home is just a project away! 🎨🔨
Essential Tools and Materials for DIY Decor
Must-have basic tools
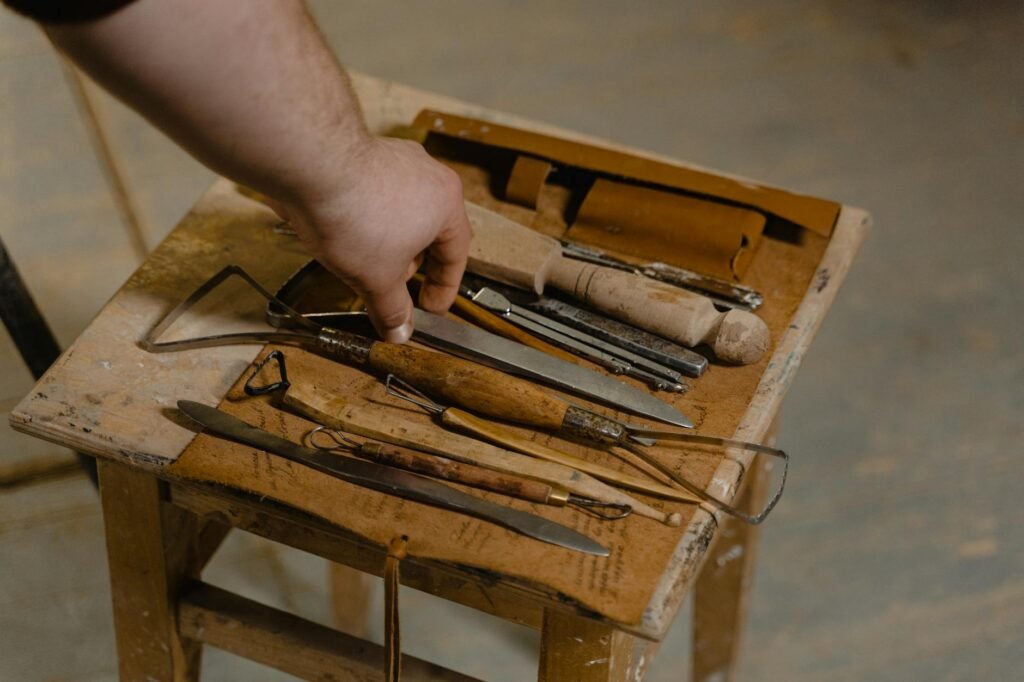
When embarking on your DIY home decor journey, having the right tools is essential. Here’s a list of must-have basic tools to get you started:
- Measuring tape
- Scissors
- Craft knife
- Glue gun
- Paintbrushes
- Hammer
- Screwdriver set
- Pliers
These versatile tools will cover most of your DIY decor needs, allowing you to tackle a wide range of projects with confidence.
Budget-friendly material options
Creating beautiful home decor doesn’t have to break the bank. Consider these affordable materials for your projects:
| Material | Uses | Estimated Cost |
|---|---|---|
| Fabric remnants | Pillow covers, wall hangings | $5-$10/yard |
| Reclaimed wood | Shelves, picture frames | Free – $20 |
| Spray paint | Furniture makeovers, accents | $5-$10/can |
| Air-dry clay | Custom planters, decorative objects | $10-$15/pack |
Where to find affordable supplies
Now that you know what tools and materials you need, here are some great places to find affordable supplies:
- Thrift stores and garage sales
- Dollar stores
- Online marketplaces (e.g., Facebook Marketplace, Craigslist)
- Craft store clearance sections
- Hardware store remnant bins
These sources often offer discounted or secondhand items, perfect for budget-conscious DIY enthusiasts. With your tools and materials in hand, you’re ready to start customizing picture frames and transforming your living space.
Customizing Picture Frames
Selecting the right frames
When customizing picture frames, choosing the right base is crucial. Consider these factors:
- Material: Wood, metal, or plastic
- Style: Modern, rustic, or vintage
- Size: Standard or custom dimensions
- Shape: Rectangle, square, or unconventional
Here’s a quick comparison of frame materials:
| Material | Durability | Customization | Cost |
|---|---|---|---|
| Wood | High | Easy | Medium |
| Metal | Very High | Moderate | High |
| Plastic | Low | Easy | Low |
Paint and distressing techniques
Transform plain frames with these techniques:
- Chalk paint for a matte finish
- Metallic spray paint for a modern look
- Distressing with sandpaper for a vintage feel
- Crackle medium for an antique appearance
Adding embellishments
Elevate your frames with creative additions:
- Buttons, beads, or sequins
- Fabric or lace wrapping
- Pressed flowers or leaves
- Seashells or pebbles
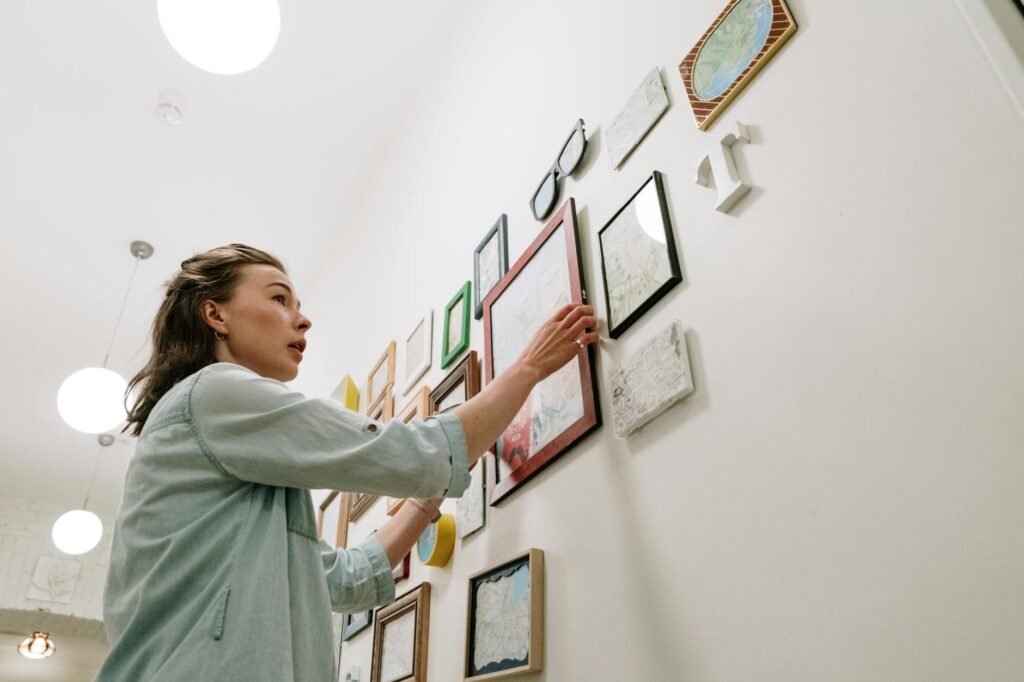
Creating a gallery wall
Design a stunning gallery wall with these tips:
- Mix frame sizes and orientations
- Choose a cohesive color scheme
- Arrange frames on the floor before hanging
- Use kraft paper templates for precise placement
Now that you’ve mastered customizing picture frames, let’s explore how to breathe new life into old furniture through upcycling.
Upcycling Old Furniture

Identifying suitable pieces
When it comes to upcycling old furniture, the first step is to find the right pieces to work with. Look for furniture with good bones and sturdy construction. Thrift stores, yard sales, and even your own attic can be treasure troves for potential projects. Consider the following criteria:
- Structural integrity
- Interesting shapes or designs
- Solid wood construction (preferable)
- Size appropriate for your space
Here’s a quick guide to help you assess potential pieces:
| Furniture Type | What to Look For | What to Avoid |
|---|---|---|
| Chairs | Solid frame, intact seat | Loose joints, extensive damage |
| Dressers | Smooth-sliding drawers, good hardware | Water damage, warped wood |
| Tables | Sturdy legs, level surface | Wobbling, severe scratches |
| Bookcases | Straight shelves, stable base | Sagging shelves, particle board |
Preparation and sanding
Once you’ve selected your piece, it’s time to prepare it for its makeover. Start by cleaning the furniture thoroughly with a mild soap solution. Next, remove any hardware and fill any holes or cracks with wood filler.
Sanding is crucial for achieving a smooth finish:
- Start with coarse-grit sandpaper (60-80 grit) for heavily damaged areas
- Progress to medium-grit (120-150 grit) for overall smoothing
- Finish with fine-grit (220+ grit) for a silky surface
Painting and finishing techniques
Now comes the fun part – bringing your vision to life! Choose a paint type that suits your project:
- Chalk paint for a matte, vintage look
- Milk paint for a rustic, chippy finish
- Acrylic paint for bold colors and durability
Apply thin, even coats using a brush or roller, allowing each layer to dry completely. For added protection and sheen, consider applying a clear topcoat.
Hardware updates
The final touch in upcycling old furniture is updating the hardware. This simple change can dramatically transform the piece’s appearance. Consider:
- Sleek modern pulls for a contemporary look
- Vintage knobs for a shabby chic vibe
- Leather pulls for a rustic touch
Remember to measure the existing holes before purchasing new hardware to ensure a proper fit. With these steps, you’ll breathe new life into old furniture, creating unique pieces that reflect your personal style.
Creating Custom Wall Art

Canvas painting for beginners
Canvas painting is an excellent way to create custom wall art, even if you’re a complete novice. Start with a pre-stretched canvas and acrylic paints, which are easy to use and forgiving. Here’s a simple technique to create a stunning abstract piece:
- Choose 3-4 complementary colors
- Apply a base coat of your lightest color
- Use a palette knife to spread other colors in random patterns
- Blend colors where they meet for a seamless look
Typography and quote art
Typography art is both trendy and personal. Create your own inspirational quote art with these steps:
- Select a meaningful quote
- Choose a font style (mix styles for added interest)
- Sketch the layout on paper first
- Transfer to canvas or wood using transfer paper
- Paint or use markers to fill in the letters
Pressed flower art
Bring nature indoors with pressed flower art:
- Press flowers between heavy books for 2-3 weeks
- Arrange pressed flowers on acid-free paper
- Carefully glue flowers in place
- Frame your creation in a shadowbox frame
DIY macramé wall hanging
Macramé adds texture and bohemian flair to any room. Here’s a simple design to get you started:
| Material | Quantity |
|---|---|
| Cotton cord | 30 yards |
| Wooden dowel | 1 (18 inches) |
| Scissors | 1 pair |
- Cut 8 strands of cord, each 6 feet long
- Fold cords in half and attach to dowel using lark’s head knots
- Create alternating square knots down the length
- Add fringe at the bottom for a finishing touch
Now that you’ve explored various custom wall art options, let’s move on to another simple yet effective way to spruce up your living space: revamping throw pillows.
For more inspiration on DIY home decor projects, visit Better Homes & Gardens. They offer a wide variety of beginner-friendly ideas!
Revamping Throw Pillows
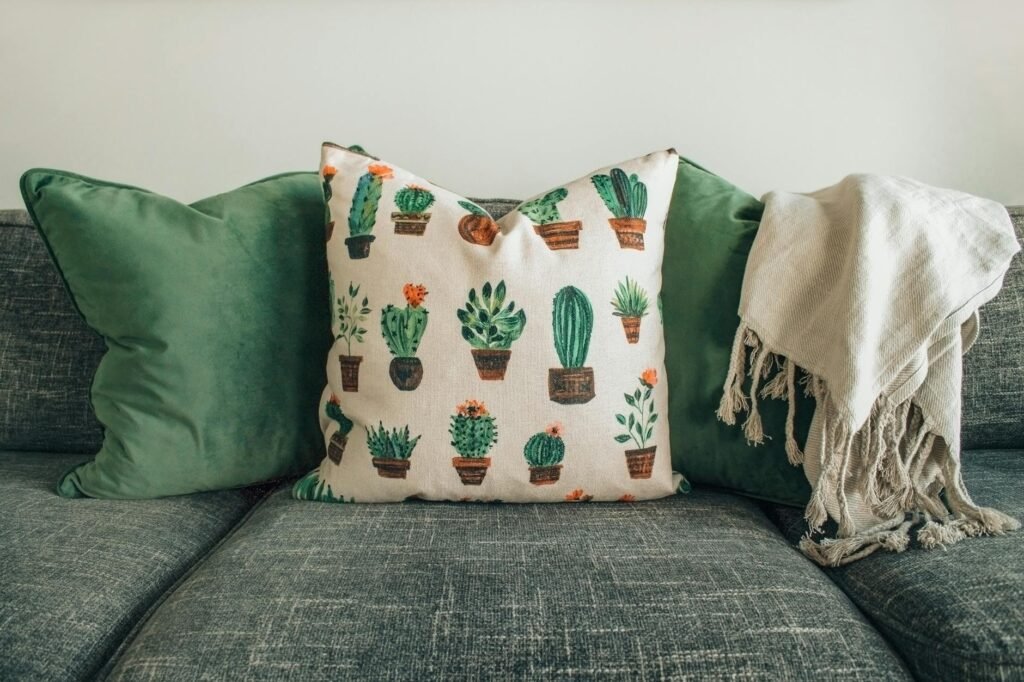
No-sew pillow cover options
Transform your throw pillows without touching a needle and thread! Here are three easy no-sew options:
- Fabric wrap method
- Envelope fold technique
- Knotted corner design
Each method offers a unique look and requires minimal effort. Let’s compare them:
| Method | Difficulty | Time Required | Materials Needed |
|---|---|---|---|
| Fabric wrap | Easy | 10-15 minutes | Fabric, scissors, fabric glue |
| Envelope fold | Medium | 15-20 minutes | Fabric, iron, fabric tape |
| Knotted corner | Easy | 5-10 minutes | Large square fabric |
Simple embroidery techniques
Add a personal touch to your pillows with these beginner-friendly embroidery techniques:
- Running stitch: Perfect for creating simple patterns or words
- French knot: Ideal for adding texture and small details
- Satin stitch: Great for filling in shapes and creating bold designs
Practice these stitches on scrap fabric before tackling your pillow project. Remember, imperfections add character!
Adding tassels and pom-poms
Elevate your throw pillows with playful tassels and pom-poms. Here’s a quick guide:
- Choose complementary colors to your pillow fabric
- Attach tassels to pillow corners using fabric glue or hand-sewing
- Create a pom-pom border by gluing them along the pillow’s edge
Mix and match these elements to create a unique, eye-catching design. With these simple techniques, you’ll breathe new life into your throw pillows and add a personal touch to your home decor. Next, we’ll explore how to craft unique planters to complement your newly revamped pillows.
Crafting Unique Planters

Painting terracotta pots
Terracotta pots are a versatile canvas for your creativity. Start by cleaning the pot thoroughly and applying a base coat of acrylic paint. Once dry, let your imagination run wild with patterns, colors, or even intricate designs. Here’s a quick guide to get you started:
- Geometric patterns: Use painter’s tape to create clean lines
- Ombré effect: Blend two or more colors for a gradient look
- Stencil designs: Apply pre-made stencils for professional-looking results
- Freehand artwork: Unleash your inner artist with unique drawings
Making concrete planters
Concrete planters offer a modern, industrial aesthetic to your space. Follow these steps to create your own:
- Mix concrete according to package instructions
- Pour into molds (plastic containers work well)
- Insert a smaller container to create the planter shape
- Allow to dry for 24-48 hours
- Remove from molds and sand any rough edges
| Mold Type | Pros | Cons |
|---|---|---|
| Plastic containers | Readily available, cheap | Limited shapes |
| Silicone molds | Flexible, reusable | More expensive |
| Custom-built forms | Unlimited design options | Requires more skill |
Repurposing household items as planters
Get creative by transforming everyday objects into unique planters. Some ideas include:
- Old boots or shoes
- Tin cans (painted or wrapped in twine)
- Vintage teacups or coffee mugs
- Hollowed-out books
- Mason jars with macramé hangers
Remember to drill drainage holes in non-porous containers to prevent water-logging. With these DIY planter ideas, you’ll add a personal touch to your indoor or outdoor greenery. Next, we’ll explore how to craft eye-catching candle holders to complement your new planters.
If you’re more of a visual learner, check out this YouTube tutorial on easy home decor projects.
DIY Candle Holders

Mason jar candle holders
Mason jar candle holders are a charming and versatile DIY project that can add a cozy ambiance to any room. Here’s how to create your own:
- Clean and dry your mason jars thoroughly
- Add decorative elements like twine, lace, or paint
- Place a tea light or votive candle inside
For a rustic look, tie twine around the jar’s neck and add a sprig of dried lavender. Alternatively, paint the jars with frosted glass paint for a soft, diffused glow.
Wood block candle holders
Wood block candle holders offer a modern, minimalist aesthetic. Follow these steps:
- Choose a wooden block (cedar or pine work well)
- Sand the block smooth
- Drill holes for candles using a spade bit
- Apply wood stain or paint as desired
| Wood Type | Characteristics | Best For |
|---|---|---|
| Cedar | Aromatic, resistant to decay | Outdoor use |
| Pine | Lightweight, easy to work with | Indoor decor |
| Oak | Durable, beautiful grain | Long-lasting pieces |
Upcycled tin can luminaries
Transform ordinary tin cans into magical luminaries with this eco-friendly project:
- Remove labels and clean cans thoroughly
- Fill with water and freeze (prevents denting while working)
- Draw or trace a design on the can
- Use a hammer and nail to punch holes along the design
- Paint the exterior (optional)
- Place a tea light inside
These luminaries create beautiful patterns of light and shadow, perfect for outdoor gatherings or cozy indoor spaces.
Now that you’ve mastered candle holders, let’s move on to creating a statement mirror that will elevate your home decor.
Creating a Statement Mirror
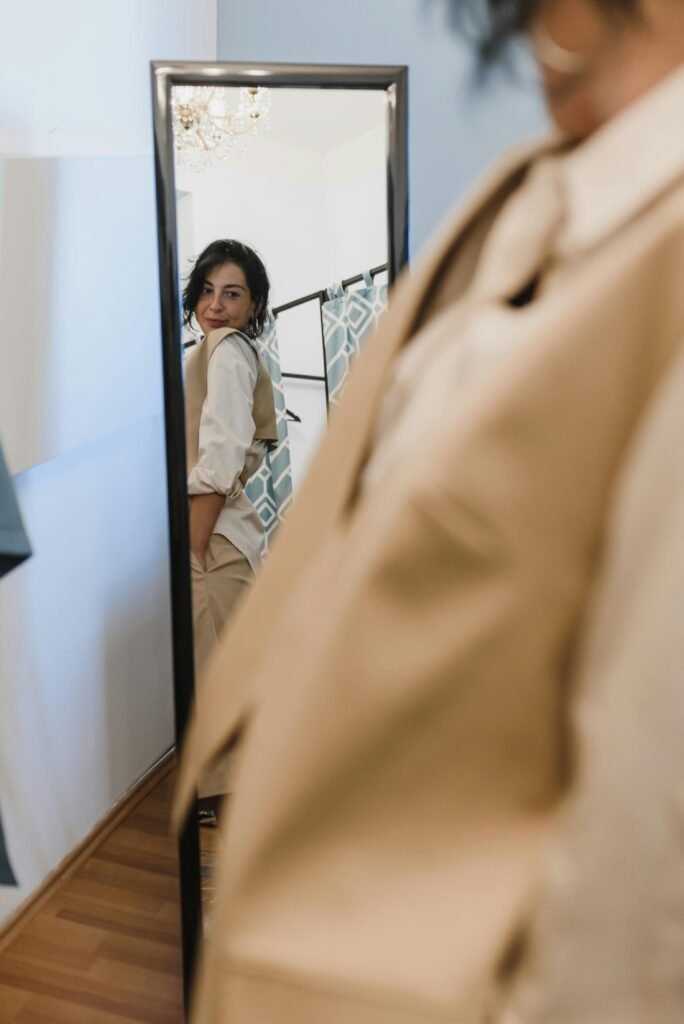
Framing a plain mirror
Transforming a plain mirror into a stunning statement piece is easier than you might think. Start by selecting a frame that complements your décor style. Whether you prefer rustic wood, sleek metal, or ornate vintage designs, the frame sets the tone for your mirror makeover.
- Measure your mirror
- Choose a frame slightly larger than the mirror
- Apply adhesive to the back of the frame
- Carefully place the mirror onto the frame
- Allow the adhesive to dry completely
Adding decorative elements
Once your mirror is framed, it’s time to get creative with decorative elements. This step allows you to personalize your mirror and make it truly unique.
| Decorative Element | Style Impact | Difficulty Level |
|---|---|---|
| Seashells | Beach/Coastal | Easy |
| Faux flowers | Romantic/Bohemian | Medium |
| Metallic accents | Modern/Glam | Easy |
| Rope or twine | Rustic/Nautical | Medium |
Choose elements that reflect your personal style and complement your room’s aesthetic. Arrange them around the frame, creating a balanced and visually appealing design.
Mosaic mirror techniques
For a more intricate and eye-catching look, consider trying mosaic techniques. This method involves using small pieces of glass, tile, or other materials to create a decorative pattern around your mirror.
- Sketch your design on the frame
- Apply adhesive in small sections
- Place mosaic pieces according to your design
- Allow the adhesive to dry
- Apply grout between the pieces
- Wipe away excess grout and polish the mirror
With these techniques, you can transform a simple mirror into a stunning focal point that adds character and style to any room. Next, we’ll explore how to craft decorative trays, another versatile DIY project that can elevate your home décor.
Crafting Decorative Trays

Transforming old picture frames
Breathe new life into old picture frames by repurposing them into stylish decorative trays. Start by removing the glass and backing, then paint the frame in your desired color. Add a sturdy base using plywood or a thin piece of wood, securing it with wood glue or small nails. For a luxurious touch, line the tray with fabric or decorative paper.
Painting and stenciling techniques
Elevate your tray’s design with these painting and stenciling techniques:
- Ombre effect: Blend multiple shades for a gradient look
- Metallic accents: Use gold or silver leaf for a touch of glamour
- Geometric patterns: Create clean lines with painter’s tape
- Faux marble: Mimic the look of marble with specialized paint techniques
- Stenciled designs: Apply intricate patterns using premade stencils
| Technique | Difficulty | Materials Needed |
|---|---|---|
| Ombre | Easy | Multiple paint colors, sponge |
| Metallic accents | Medium | Metal leaf, adhesive |
| Geometric patterns | Easy | Painter’s tape, multiple colors |
| Faux marble | Advanced | Base color, veining colors, feather |
| Stenciling | Medium | Stencil, paint, stencil brush |
Adding functional elements
Transform your tray from decorative to practical by incorporating these functional elements:
- Handles: Attach cabinet pulls or rope handles for easy carrying
- Non-slip surface: Apply cork or felt pads to prevent items from sliding
- Compartments: Create sections using small wooden dividers
- Raised edges: Add thin wooden strips around the perimeter to contain items
Now that you’ve crafted your decorative tray, let’s move on to the final touch in personalizing your space with simple window treatments.
Simple Window Treatments
No-sew curtains
No-sew curtains are an excellent option for beginners looking to add a personal touch to their windows without the need for complex sewing skills. Here’s how you can create your own:
- Choose your fabric
- Measure your window
- Cut the fabric to size
- Apply iron-on hem tape
- Attach curtain clips or rings
| Pros | Cons |
|---|---|
| Easy to make | Limited styles |
| Customizable | May not be as durable |
| Affordable | Requires ironing |
DIY roman shades
Roman shades offer a sleek, modern look and can be customized to fit any window size. Follow these steps:
- Measure your window
- Cut fabric and lining
- Attach dowels or battens
- Create lift cords
- Mount to window frame
Window film designs
Window films are a versatile and removable option for adding privacy and style to your windows:
- Choose from patterns, frosted designs, or stained glass effects
- Clean the window thoroughly
- Cut film to size
- Spray window with soapy water
- Apply film and smooth out bubbles
Creating unique tiebacks
Personalize your curtains with DIY tiebacks:
- Repurpose old jewelry or buttons
- Create tassels from yarn or rope
- Use natural elements like driftwood or seashells
- Craft fabric flowers or bows
These simple window treatments can dramatically transform your space without breaking the bank or requiring advanced DIY skills.
CONCLUSION
Embarking on DIY home decor projects is an exciting journey that allows you to express your creativity and personalize your living space. From customizing picture frames to crafting unique planters, these ten easy projects offer a perfect starting point for beginners. By upcycling old furniture, creating custom wall art, and revamping throw pillows, you can breathe new life into your home without breaking the bank.
As you explore these DIY ideas, remember that the key to success lies in starting small and building your skills gradually. Don’t be afraid to experiment with different techniques and materials. With each project, you’ll gain confidence and develop your own unique style. So grab your tools, unleash your imagination, and transform your living space into a reflection of your personality and taste.